53 Genius Kitchen Organization Hacks I Wish Someone Had Given Me
Disclosure: This post contains affiliate links. If you buy through them, I may earn a small commission at no extra cost to you.
Is your kitchen feeling cluttered… or maybe just slightly annoying?
Same. I’m not a fan of over-stuffed anything. I lean minimalist and try to keep things simple. But even in a “low-stuff” kitchen, things get chaotic. Tupperware lids vanish. Baking sheets slide around like it’s bumper cars. And don’t get me started on the fridge.
So I started digging. Not because I want a Pinterest-perfect kitchen, but because I want a functional one that doesn’t stress me out.
Here are 53 clever kitchen organization hacks I’ve come across. A mix of things I’ve tried, things I plan to try, and a few that made me go “okay, that’s actually smart.”
Whether you’re in a small space, on a tight budget, or just tired of your drawers turning into junk zones, you’ll find something in here that makes real life a little easier.
Before we get into the hacks, you might want to check out this post where I break down how a well-organized kitchen can save you serious time and money. It’s more than just “neat freak” vibes, the math adds up.
Pantry Hacks
Pantries (or any food storage cabinets) can easily become black holes of forgotten pasta and stale crackers. I’ve got a different post just for pantries here. It’s a quick scroll packed with ideas that actually work in real life.These hacks will help you tidy up dry goods and keep everything in sight and within reach:
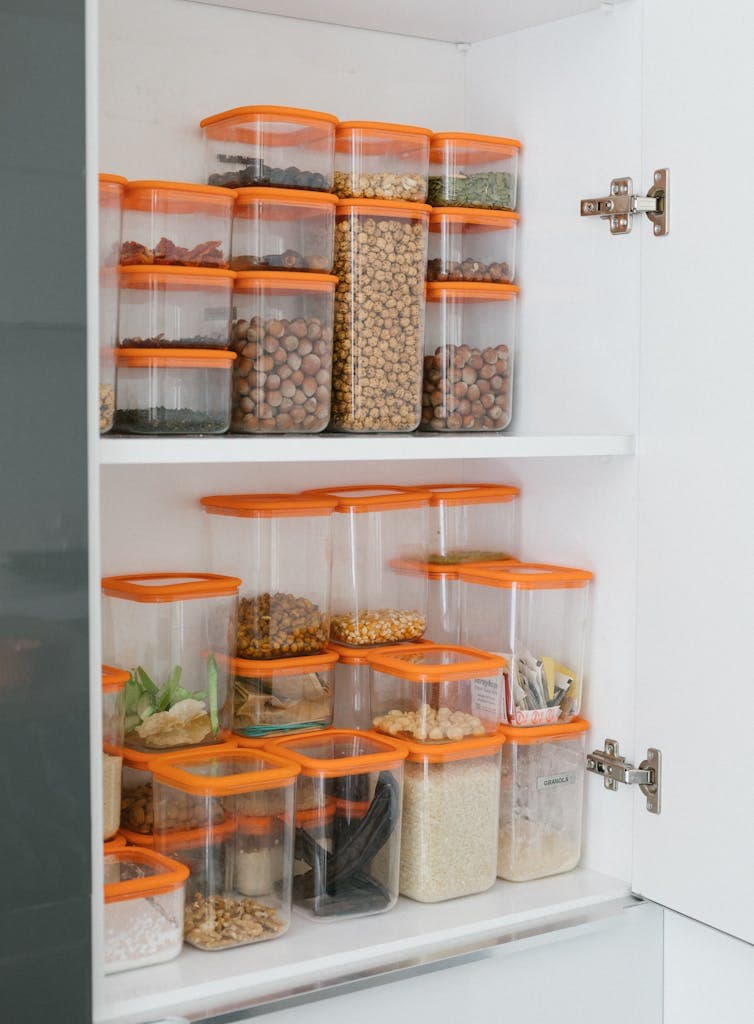
1. Decant into Clear Containers: Transfer bulk items like flour, cereal, rice, and snacks into clear jars or plastic containers and label them. Uniform containers maximize shelf space and let you see when you’re running low at a glance. No more half-open bags tumbling out. (Pro tip: Those old spaghetti sauce jars? Perfect for storing rice and beans. Free storage, baby.)
2. Lazy Susan for Hard-to-Reach Items: Place a lazy Susan (turntable) on a pantry shelf for oils, vinegars, sauces, or spices. Just spin it to bring what you need to the front. No more digging in the back for that one bottle of soy sauce – it’s all easily accessible with a quick spin.
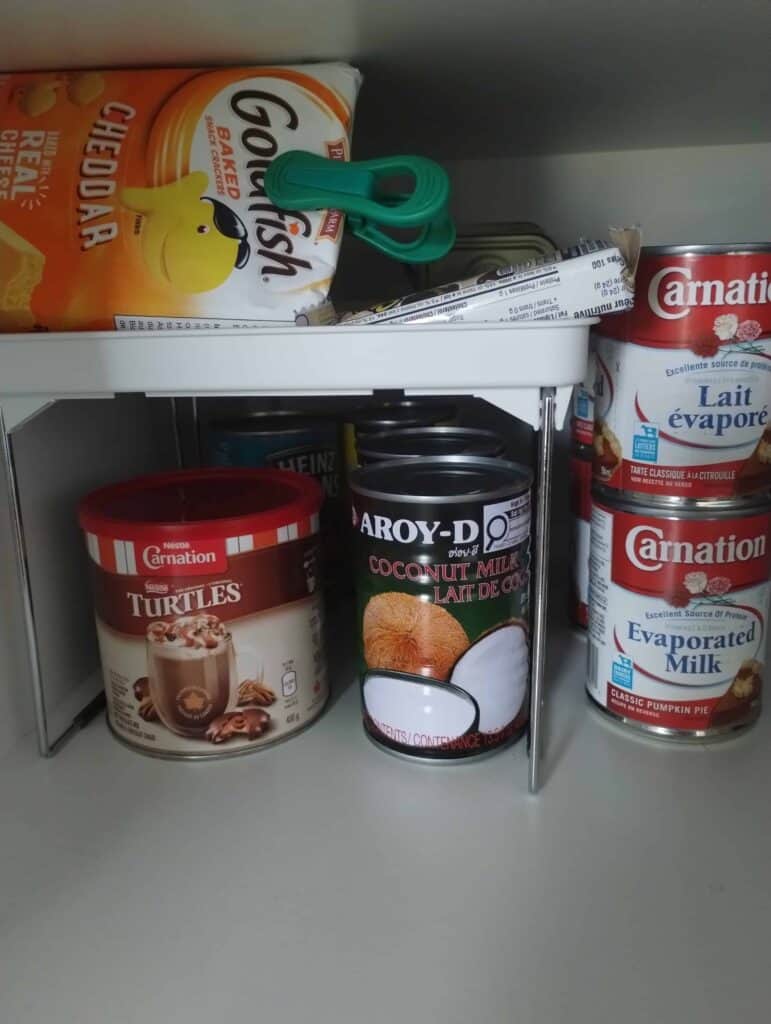
3. Tiered Shelf Risers: Use tiered riser racks (little step-like shelves) for canned goods, spices, or jars. They create stadium seating for your jars and cans, so you can see the labels of items in the back row. This saves you from buying duplicates because you thought you were out of something that was hiding behind others.
4. Over-the-Door Pantry Organizer: The back of your pantry door is prime real estate. Hang an over-the-door organizer (the kind with clear pockets or shelves) to hold packets, spice jars, sauce mixes, or snacks. It’s an ideal solution for small kitchens or rentals because it adds tons of storage without any installation – perfect for storing those sauce packets or tea collections.
5. Baskets or Bins for Grouping: Corral similar items in bins or baskets on your pantry shelves. For example, have a “snacks” basket or a “baking supplies” bin. When you need something, you can pull out the whole basket to find what you want. This saves time and keeps your shelves from becoming a jumbled mess. Pro tip: Label each basket (“Breakfast,” “School Snacks,” “Pasta,” etc.) so everyone in the family knows what goes where.
6. Under-Shelf Wire Baskets: Take advantage of the empty air space under pantry shelves by hooking on under-shelf wire baskets. These handy add-ons slip onto a shelf and give you a mini basket underneath it – great for storing lighter items like napkins, tortillas, or packets. You’ve just doubled a shelf’s storage in two seconds with zero tools.
7. First In, First Out (FIFO) for Food: Organizing isn’t just about containers – it’s also about how you arrange your food.
When you restock groceries, put newer items to the back and bring older items to the front of the shelf or bin. This “first in, first out” method means you’ll use up food before it expires and avoid finding stale crackers or expired soup cans that got pushed to the back. It’s a simple hack that reduces waste and keeps your pantry contents under control.
8. Hang Chip Bags with Clips: If you have wire pantry shelves (or even a rack), use clothespins or binder clips to hang lightweight bags (chips, popcorn, nuts) along the underside of a shelf. You can also clip bags to a tension rod mounted under a shelf. This frees up shelf surface space and keeps bags sealed and visible – a genius way to store chips without them ending up in a pile.
9. Use the “Secret” Back Wall: Look at the side or back wall of your pantry or cabinet – you can stick some adhesive hooks or small pegboards there. Hang lightweight tools like measuring spoons, a whisk, or a cup measure, or attach clips for holding notes/recipes. It’s a small hack that uses every inch of space (and keeps those little tools from getting lost in drawers).
Cabinet Hacks
Cabinets can either be your best friend or a chaotic cave. Turn your cabinets into an organized dream with these ideas, no power tools required:
10. Hooks Inside Cabinet Doors: The inside of cabinet doors is an often-forgotten spot for storage. Add a few Command hooks inside the doors to hang measuring cups, spoons, oven mitts, or even pot lids (hook two hooks to hold the lid by its rim). This keeps items you use often right at hand when you open the door. It’s renter-friendly (no drilling) and frees up shelf space that bulky mitts or stacks of lids would otherwise hog.
11. Vertical File for Cutting Boards & Lids: Stop wrestling with that pile of cutting boards and cookie sheets. Store them vertically! Place a simple file sorter (the kind for desk papers) or a clean dish rack inside your cabinet and slide cutting boards, baking sheets, and pan lids into the slots.
12. Add Shelf Risers: Many cabinets have a lot of wasted vertical space. Enter shelf risers (stackable mini-shelves you put on an existing shelf). Use them to create an extra tier in a tall cabinet – for example, set a riser in your plate cabinet so you can have a layer of plates underneath and another on top, instead of one teetering tower.
13. Hang Mugs Under Shelves: Love your mug collection but short on shelf space? Install small hooks under a cabinet or shelf to hang mugs by their handles. Many adhesive hooks can hold a mug securely if you don’t want to screw into cabinets. This not only frees shelf space for plates, but turns your cute mugs into kitchen decor. (It also works for hanging utensils or even stemmed wine glasses with the right hooks)
14. Bins as Pull-Out Drawers: Deep cabinets can feel like a black hole where cans and gadgets go to disappear at the back. A cheap fix is to use plastic bins or baskets as makeshift drawers. Load your items into a bin, and when you need something in the back, just slide the whole bin out like a drawer. No fancy installed sliders needed. For example, keep all your baking supplies in one basket in a lower cabinet; when it’s brownie time, pull out the basket and everything is right there.
15. Lazy Susan in Corner Cabinet: If you have a pesky corner cabinet (those deep ones where things vanish into the abyss), place a large lazy Susan inside. It works just like in the pantry – store your oils, vinegars, or spices on it and spin them to fetch items from the back.
16. Over-the-Cabinet-Door Organizer: Grab an over-the-door caddy or basket that hooks onto the top of a cabinet door (usually used under sinks). You can hang these on any cabinet door to hold cutting boards, plastic wrap, aluminum foil, or even cleaning bottles. Since they just hook on, they’re great for rentals and add storage in seconds. Try one on the cabinet under the sink for trash bags and sponges, or on a pantry cabinet for wraps and foil boxes.
17. Towel Bar on Cabinet Side: The end side of a cabinet or kitchen island is often empty – mount a small towel bar there to hang kitchen towels, oven mitts, or even produce bags. If drilling isn’t an option, use an adhesive or over-the-door style towel bar that hooks on top of the cabinet door or sticks on. Suddenly you have a dedicated place for your dish towel to dry (instead of it ending up on the stove handle or counter) and free up counter space from those stray cloths.
Drawer Hacks
Drawers hide clutter – until they jam because a utensil got wedged, or you can’t find that one peeler. Tame your drawers with these easy fixes:
18. Drawer Dividers: Drawers become chaotic when everything slides around. Everything gets a designated slot, so that soup ladle and can opener aren’t constantly tangling with each other. No more jamming drawers because something got stuck.
19. File-Fold Your Linens: Steal a trick from Marie Kondo for your kitchen towels and napkins: fold and stand them upright in the drawer instead of stacking. By “file folding” your dishcloths or even flexible Tupperware lids, you can see all your items at once. This vertical storage hack means no more rummaging under piles – just take the one you need and the rest stay put.
20. Small Containers for Tiny Items: Inside your drawers, use small containers (think: little plastic bins, repurposed takeout containers, even silicone cupcake liners) to contain all the bits and bobs. Drawer organizers can be expensive, but you can DIY it: line up a few small boxes or trays inside a drawer to separate things like corn cob holders, wine stoppers, bag clips, twist ties, and other easy-to-lose items. This keeps tiny tools from disappearing into the abyss of the drawer and saves you time hunting.
21. Dedicate a Spice Drawer: If you have a shallow drawer available, consider laying your spice jars in it. You can use a spice drawer insert or even just arrange jars at an angle so their labels are visible. It’s oddly satisfying to open a drawer and see all your spices at once, neatly in rows. Plus, this frees up cabinet space and makes grabbing the cumin or cinnamon super convenient while cooking.
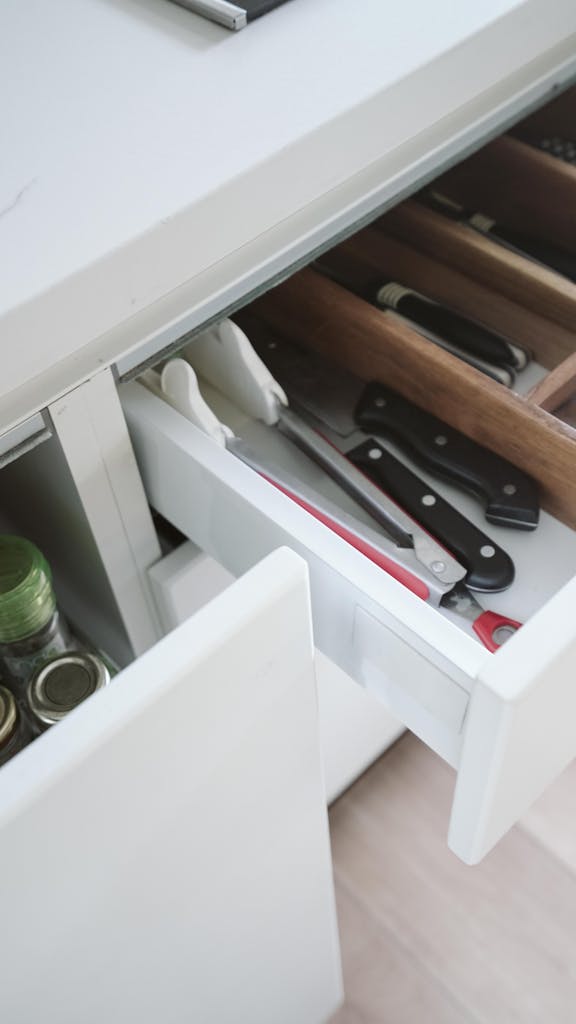
22. In-Drawer Knife Organizer: Free up counter space by ditching the bulky knife block. Instead, use an in-drawer knife tray or mat to store your knives safely in a drawer. These are usually angled slots or a bamboo insert that keeps knives separated (so they stay sharp and you don’t cut yourself reaching in).
23. Kid-Friendly Drawer: For families, designate a low drawer as the “kid zone.” Store kids’ plates, bowls, cups, and even easy snacks in a drawer they can reach. Not only does this make it simple for kids to grab their own cereal bowl or help set the table, but it also teaches them to put things back in their special spot.
24. Organize the Junk Drawer: Every kitchen has that infamous “junk drawer.” To keep yours from overflowing with random knick-knacks, give it a quick organization: use an ice cube tray, muffin tin, or a handful of little containers to sort small items (batteries, thumbtacks, rubber bands, spare keys, etc.).
Fridge & Freezer Hacks
An organized fridge means less food waste and easier meal prep. No more mysterious leftovers or forgotten veggies turning to mush. Try these fridge and freezer hacks:
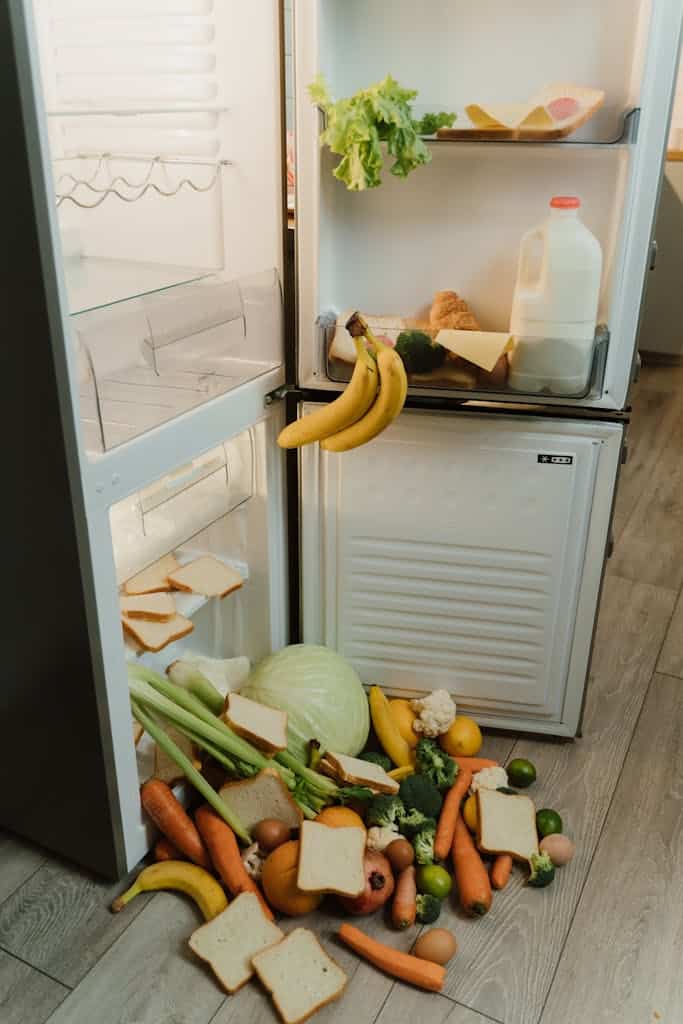
25. Clear Bins for Fridge Zones: Just like in your pantry, using clear plastic bins in the fridge can work wonders. Assign each bin a category: a bin for cheeses, one for deli meats, one for yogurt and snacks, etc. Instead of shuffling 10 items to get to the one you want, you can pull out the whole bin and grab what you need. The clear bins let you see everything at a glance and contain any accidental spills (looking at you, leaky chicken packet). It’s like giving your fridge drawers within drawers – super handy, especially in a crowded fridge.
26. Lazy Susan for Condiments: Ever find five half-used mustard bottles lurking in the back of the fridge door? A small lazy Susan on a fridge shelf can help. Put your condiments or jars on it, and spin to see what’s hiding in the back.
This saves you time (and ketchup bottles avalanching on you). It works especially well for deep fridges or for items you use often – just whirl it around to fetch the salsa or pickles. You’ll wish you’d done this sooner when you realize you’re no longer forgetting about that jar of olives on the back of the shelf.
27. Binder Clips on Shelves: Here’s a quirky one: If your fridge has wire shelves, clip a sturdy binder clip onto one of the wires at the front of a shelf. Now you can rest bottles horizontally on that shelf without them rolling – the clip acts as a stopper. You can also use binder clips to hang small bags (like half-used frozen veggie bags or shredded cheese pouches) from those wire shelves. This maximizes your vertical space and keeps items from getting lost in messy piles. It’s a cheap hack that makes your fridge feel a bit bigger.
28. Egg Carton Trick for Condiments: Tired of pounding the ketchup bottle to get the last drop? Take an empty egg carton (just the bottom half) and place condiment bottles upside down in the individual egg cups. Line the carton along a fridge shelf or door shelf. It will hold bottles like ketchup, mustard, and dressings upside down so the contents are always at the tip, ready to pour.
Plus, it keeps them from toppling over. No fancy gadget needed – an egg carton means no more wasted ketchup and a neater condiment section. Here’s a video showing how-to.
29. “Eat Me First” Bin: Designate a bin or section of your fridge for foods that should be used soon. Label it “Eat Me First” or “Use Now.” This is where yesterday’s leftovers, that half avocado, or the yogurt nearing its expiration date should live. Whenever someone opens the fridge looking for a snack, they’ll see the “eat me first” items. This hack reduces food waste and keeps the fridge cleared out because everyone knows to check the “must-eat” bin before tearing into new groceries.
30. Adjust Shelf Heights: It sounds obvious, but many of us never move the fridge shelves from the default positions. If your fridge interior is feeling inefficient (too short for tall bottles, too much empty space above short items), reconfigure it.
Raise or lower adjustable shelves to fit your actual groceries – for instance, make a taller space for milk jugs or juice, and a shorter space for eggs and leftovers. By customizing the layout, you avoid wasted space and everything fits like a puzzle. You might free up an entire extra shelf just by moving things around!
31. Freeze Flat & File It: In the freezer, save space by freezing things flat. For example, if you have leftover soup or ground meat, put it in a freezer zip-top bag and lay it flat to freeze. Once frozen, you can “file” these flat bags upright in a shoebox or magazine file in the freezer like a little file cabinet of food.
This method uses space efficiently and makes it easy to flip through your frozen “files” to find the dinner you want. Also, use bins in the freezer for categories (veggies, meats, ice cream, etc.) so that you can pull out the entire “frozen veggies” bin rather than pawing around the icy depths for a lone bag of peas.
Small Space Hacks
Working with a tiny kitchen or a minimalist vibe? These hacks will help you squeeze the most out of every square inch (and even add some extra space you didn’t know you had):
32. Magnetic Knife Strip: Ditch the counter knife block and save precious space by mounting a magnetic knife strip on the wall. It safely holds knives and even metal utensils or scissors. No wall space? Consider the side of your fridge – many magnetic strips can stick right on. Freeing up that counter or drawer space and having your knives in easy reach will make you wonder why you ever had a clunky block taking up half your counter. (Bonus: It looks like a cool chef’s kitchen upgrade.)
33. Use the Sides of Your Cabinets: In a small kitchen, even the outsides of your cabinets can be storage. Attach a few Command hooks or a magnetic rack to the side of a cabinet. You can hang oven mitts, dish towels, or measuring cups there, or stick a magnetic spice rack to the fridge’s side.
34. Over-the-Sink Cutting Board or Rack: Get a cutting board that fits over your sink or a roll-up drying rack that lies across it. These let you use the sink area as extra counter space when you need it.
35. Nesting and Collapsible Tools: Opt for nesting bowls, nesting measuring cups/spoons, and collapsible colanders or containers. These modern marvels flatten or fit into each other, taking up a fraction of the space of their non-collapsible counterparts.
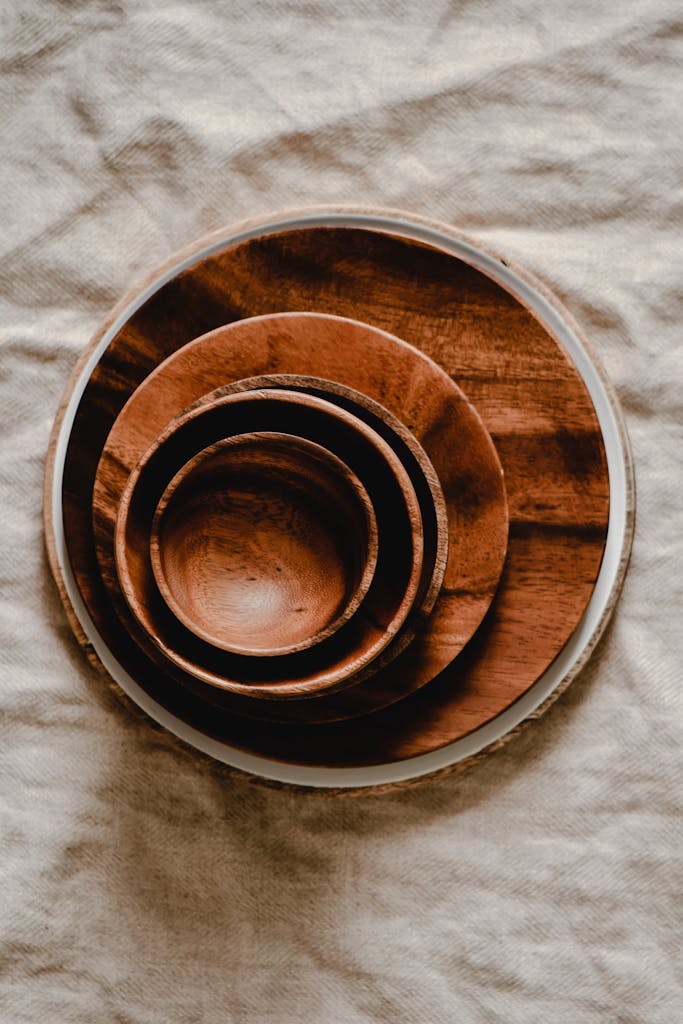
36. Use High Spaces (Above Cabinets or Fridge): Look up – is there space above your kitchen cabinets or on top of your fridge? That’s prime storage for stuff you don’t need every day. Pop a couple of nice baskets or bins up there and store infrequently used items: the holiday platter, the huge stockpot, extra paper towels, or backstock of canned goods. It keeps them out of sight but accessible with a step stool. Using matching baskets will make it look intentional and neat, not like you just tossed junk up there
37. Slim Rolling Cart for Gaps: There are slim rolling carts (some as narrow as 6 inches) designed to slide into that gap between your fridge and the wall or between cabinets. Consider getting one to store spices, cans, or cleaning supplies. You simply pull it out like a tall, thin drawer. It’s essentially converting that awkward gap into a super-useful pantry. If you move, it comes with you – no installation required. Tiny space transformed into storage!
38. Multi-Purpose Island or Cart: If you have a bit of floor space, a small kitchen cart or island on wheels can be helpful too. It provides extra countertop for prep and shelves or drawers for storage. Look for one with wheels so you can roll it aside when you need floor space, or roll it over to wherever you’re working. Some even have drop-leaves that fold down to save space when not in use.
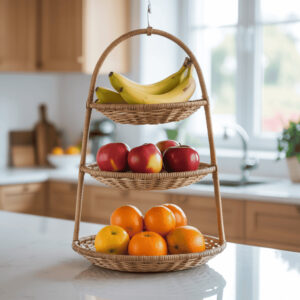
39. Hanging Fruit Basket: Free up counter space by hanging a tiered fruit basket. Storing fruits and veggies this way not only looks charming (hello, countertop produce display out of thin air) but also keeps them off your limited counter space. Plus, good airflow around produce can help it last longer.
40. Repurpose a Bookshelf as a Pantry: No pantry? No problem. A simple bookshelf or open shelving unit against a kitchen wall can become a makeshift pantry or extra cabinet. Load it up with jars, baskets, and canisters of food. Use attractive bins to group items so it doesn’t look cluttered.
41. Pans in the Oven: Just remember to take ’em out before preheating! This is not a hack I’m likely to try as I’d probably forget.
Budget & DIY Hacks
Organizing your kitchen doesn’t have to mean buying expensive organizers. Try these budget-friendly DIY hacks using items you probably already have or can get for a few bucks:
42. Tension Rod for Spray Bottles: A simple tension rod (the kind for curtains) can be a hero under your sink. Tension rod under the sink = instant hanging storage for spray bottles. They can free up the whole cabinet floor for other stuff. It’s like adding a mini hanging rack in a cabinet.
43. Command Hooks Everywhere: Inside cabinet doors, on the backsplash, under shelves. Removable, affordable, and they hold everything from spatulas to coffee mugs.
44. DIY Drawer Organizers: Before you buy pricey custom inserts, look around your home for DIY alternatives. Sturdy shoeboxes or their lids, cut-up cereal boxes, or cardboard dividers can be cut to size and placed in drawers to sort your stuff.
45. Repurpose Jars and Cans: Instead of buying new containers, use what you have. Finished a jar of peanut butter or pasta sauce? Wash it out and use it to store dry goods, nuts, or homemade spice blends. Coffee tins or oatmeal canisters can hold utensils or baggies. An old cookie tin can become a snack container. This not only saves money, but gives a second life to containers.
46. Pegboard Wall Organizer: Pegboard isn’t just for garages – a small pegboard panel on a kitchen wall can hold pots, pans, and tools with simple hooks. Pegboard is inexpensive and you can paint it to match your decor.
47. Jar Lids Under Shelves: This is an old-school clever hack: take the lids of jars (like mason jar lids) and screw them into the underside of a shelf or cabinet. Visual step by step here
Then fill the jars with spices, screws, tea bags, or candies and twist them onto their lids so they hang down from the shelf.
48. No-Drill Paper Towel Holder: Don’t have a mounted paper towel holder? Make one with two Command hooks! Stick two hooks on the underside of an upper cabinet or on the side of a cabinet, spaced just wide enough to hold a roll of paper towels between them. Then slide the roll onto them. Boom – instant paper towel bar with no holes and no counter space taken.
49. Ice Cube Trays for Small Items: Before you toss that old ice cube tray, repurpose it as an organizer. Ice cube trays are perfect for sorting small bits in a drawer or cabinet. Use one in a junk drawer for spare buttons, thumbtacks, and coins, or in a craft drawer for pins and clips. In the kitchen, you can use an ice tray to store decorative cake sprinkles or cupcake liners (separated by color/design) or even to organize different flavors of tea bags. Each little compartment keeps items separate and visible. And it cost you nothing!
50. Dollar Store Bins & Baskets: Embrace the dollar store for inexpensive organizing supplies. You can often find small plastic baskets, shelf risers, hooks, and caddies for just a dollar or two each. These are fantastic for grouping items in your fridge, corralling packets in the pantry, or dividing up drawer space.
51. Magazine File = Organizer: Those cardboard or metal magazine files (meant to stand on a desk) can be a secret weapon in the kitchen. Turn one on its side and you’ve got a horizontal shelf for cans or spices. Stand it upright and you can file cutting boards, tin foil boxes, or water bottles in it. Or just grab something made for purpose on Amazon.
Final Touches: Labels & Decluttering
These last few tips are the “secret sauce” that keep your kitchen organized in the long run. They’re simple habits or finishing touches that make a big difference:
52. Label Everything: This can help keep your system from falling apart in a week. Label everything – bins, shelves, containers. When every container says what’s inside (and every shelf has a purpose like “Canned Goods” or “Snacks”), it’s so much easier for you (and your family) to put things back where they belong. You don’t need a fancy label maker – masking tape or chalkboard labels work too.
53. Embrace the “Less is More” Principle: The ultimate hack for an organized kitchen is actually owning only what you use and love. It’s not as fun as a shiny new organizer, but it’s effective. Go through your tools and gadgets and declutter: do you really need 5 spatulas or that bread maker you haven’t touched in 3 years?
By donating or storing rarely used items, you free up space for the things you do use. Also, try a one-in-one-out rule for appliances and gadgets – if you buy a new one, consider letting go of an older one.
An airy, clutter-free kitchen is easier to keep tidy. Remember, sometimes the best organization hack is a good purge!
Bottomline
Start Where You Are
Pick one hack that solves your biggest pain point. For me, it was the spice situation (27 bottles all playing hide-and-seek).
You don’t need all 50+ hacks. Heck, you probably only need 3. But if one of them helps you stop wrestling a baking sheet avalanche or find the cumin faster, I call that a win.
Tried any of these? Got a hack I need to know about? Drop it in the comments. I’m always down to borrow a good idea.
Happy organizing 💛
